


Statement of Intent
Review
At the beginning of the course I only had knowledge of Photoshop and therefore unit 1 was a breeze, but it soon changed as Maya and mud box were introduced. I had no idea how to create anything in Maya beforehand and it was a very scary program at first. This lead to what feels like my greatest achievement; after repetitive use of the program I have a lot of experience and I feel like I can create literally anything in it. I grew very confident in my modelling skills. When Unity was introduced I felt like this is where I would shine the most, but it turned out to be the opposite. I struggled with programming, particle systems, and building a game in general. Which was later reinforced from when I dedicated my timeleap project to unity, where I got more comfortable in physics and particle systems but it still couldn't compare in what I can do in Maya. Therefore my final project focuses on modelling.
Project Concept & Proposed Artist Statement
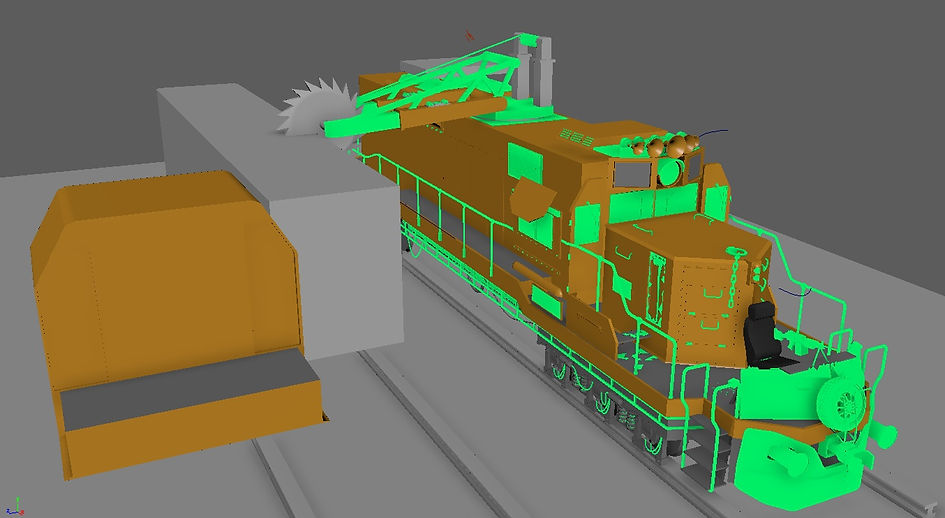
My final project heavily focuses on modelling and camera movement in Maya, then showing it off in a frozen action scene, just like in the frozen heist. My scene will consist of two trains; one future-like police train and a normal cargo train owned by bandits. This will allow me to model shiny new and old rusty materials. The scene will be set in a desert environment to give off the mad max (2015) vibe which is the theme of the bandit train. The trains will have their own colour scheme too; rusty orange for the bandits and a flashy white, blue and black for the police, which will help in distinguishing which is which. Camera movement will have to be smooth and slowly revealing the whole picture while emphasizing on the details of the modelling. Once I've finished the modelling of the scene I will debate wither to add characters to my scene, which will help in the overall understanding of the scene, but modelling characters in Mudbox is not one of my strong points. I also have another option to cover time or replace the characters, which is to animate the whole scene so that the camera can move in a bullet time-like environment as seen in the trailer of cyberpunk 2077 (2013). This adds to all the chaos of the scene and overall is more appealing. The project will aim to show of my modelling skills rather than engaging the audience as that will aid me more into when I'm trying for a university.
Methods
Nearly all of my work will be done in Maya since I will prioritise modelling the scene over the characters, plus the camera work will be done in Maya with the render engine being Mental Ray. To aid in my modelling I will use Photoshop to customize textures to suit my needs. Characters will be made in Mudbox but I will also experiment a bit in Zbrush to see which software is better for me. Finally I will use Sony Vegas to put all the clips together and create a montage of the scene with matching music.
Evaluation
The focus of my project is on detail, so the more detail I include of little parts the bigger my success. My trains must look life-like with no obvious tiling of textures. The poly count of my project doesn't matter as it will be a one time render so I will be free to go over the top in everything and the poly count number will suggest in how much detail I went in (the more polygons the better in this case).
Proposed reaserch sources
George Miller, 2015, Mad Max, Movie
CD Project Red, 2013, Cyberpunk 2077, video game trailer
Philips, 2009, Frozen heist, Technology showcase
Gearbox Software, 2009, Borderlands, video game
Firaxis games, 2016, xcom 2, video game


Inspiration
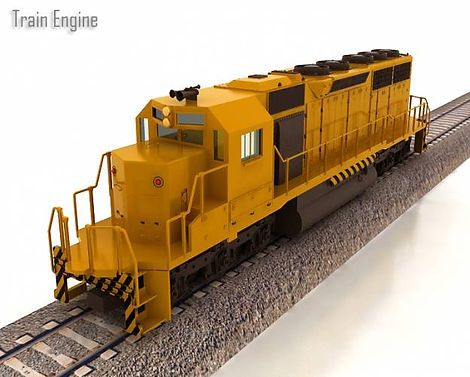
I really like the way that frozen heist presented the scene, so I really wanted to make something detailed to the fly around it in the frozen heist style. While searching for things I could model I was thinking of a Chinese temple being destroyed, but I soon changed my idea how would have to create waterfalls, grass and trees. So now I'm searching again and I come up against some old locomotive trains which I really like the heavy detail modelling. From that I wanted to do an action scene using trains and came up with a train raid that consists of two trains that are different in their own way which will show the variety of materials I can work with.
Why two trains?
This is to show a contrast between the modern futuristic-like police train and the makeshift bandit train, made from scavenged parts inspired by the mad max style of vehicles. This will show that I can work with ruined materials and new modern materials. The trains will have their own colour scheme: the police will be white and blue, which will heavily stand out from the dark and rusted bandit train. To emphasize the psychopathic bandits their train will include a jet engine for their main propellant inspired by the game "borderlands". The bandit train should be completed around week 6-7, and then the police train should be finished 8-9. Rendering should be finished by the 10th week and final processing by the 11th week

Final Major Project Proposal
My initial idea was to model an extremely detailed locomotive, but from repeatedly being fed back that my idea is too simple and boring I decided to spice things up a bit. So from that I came to an idea of a train robbery; where bandits in their makeshift train regularly make attacks on other trains for supplies. It doesn’t matter if it’s a cargo train for supplies, a passenger train for hostages, or even a police train for weaponry. In this case I’m going for a police train. My scene will include a bandit train, a police train being robbed, two bandits, and a police officer. The project will emphasize on telling a story in a frozen action scene, just like the frozen heist. The characters will be soft modelled in Mudbox with their gear being hard modelled in Maya.
Environment
I still haven't decide in what sort of environment to place the scene in. I will be experimenting in a desert, forest and a small abandoned settlement. All of these areas are isolated from the major public so I can include brutal and dark images caused by the bandits that wouldn't be possible I'm a rural area. These will include bandit graffiti, executions, and parts of other destroyed trains. The desert will give off the mad max vibe and make it feel like the bandits are true psychopaths, which will be reinforced by their facial expressions in the scene. The abandoned settlement could be used as headquarters for the bandits, which will allow me to show forms of cannibalism, and monuments to intimidate and scare away bypassers.
Frozen heist
Bandit train- Borderlands 2 by Gearbox software


Unit 8
Rail Raiders
Because my train is a the main object that I'm going to model I really needed a train that has enough detail for me to model, and also is simple enough for me to add my own modifications such as turrets and other weaponry. Just having a train will make the scene very boring so I have to add another sub-train, which will not be the main focus but will instead add to the story of the scene, which will not only make the scene more interesting but also add depth to my project. The backstory will tell me what kind of weaponry the train should have and how it should be destroyed I drew inspiration from frozen heist and the banditry style of borderlands the game on how to present my project. The frozen heist is a perfect way to present my scene I can focus on the detail of my modelling while doing it in an artistic style, which also emphasizes the story of the scene.
 |  |
|---|
Week 1
Diary
 |  |
|---|
For the first week I tried to get the general shape and the skeleton model for the train, which proved actually a lot harder to start a model rather than to add detail to an already existing model.
Since I had time left over I decided to model the wheels since they seemed the easiest and did not require any adjacent models to help me get the correct position. Starting off with the wheels was a great idea as it helped me visualize the detail I will need to add to my train to make it successful. I made sure to texture as I go along therefore I don't have to live the nightmare of rendering my whole project bit by bit.
 |  |
|---|
Week 2
 |  |
|---|
 |  |
|---|
I continued my work from week 1 and added some shape to the front. The way I made the broken glass to the axe was by first making a clean window as if it wasn't broken. Then I cut out the broken area on a plane, using that ngon I extruded it to make it 3d to be able to boolean the glass to the ngon. Now the glass is broken but then I also cut out some bits and lay it on the floor, this is just to add some more detail to my work. Realistic glass will have a lot of tiny glass shards on the ground, which I did try to replicate but because of the texture on the floor they wouldn't be seen, so making the shards would just be a waste of effort and rendering time. Glass especially slows down the render times because it not only has to render all the light and objects reflecting on it ,but also it has to refract all of it inside the shape. It'll have to render all the light and other objects reflections bouncing inside while also distorting them properly to how glass realistically does it. All of this has to be done in an ngon that has been booleaned which are two properties that Maya hates to render. Therefore I minimized the number of glass pieces used in the scene. The opaque glass will be just a highly reflective material to cut down rendering times.
Week 3
 |  |
|---|
 |  |
|---|
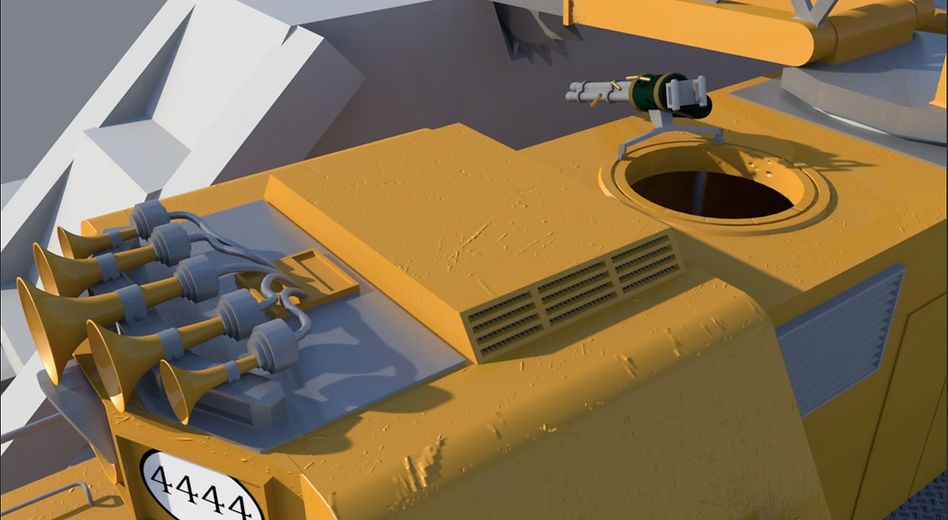
Week 3 is when I stared making this a bandit train. I added some armour (which are car doors), an m249 machine gun, and a seat for the gunner. Starting off the gun was just like starting off the train; it's hard mapping out the shape but once you start doing details it becomes easier and easier. The car doors have a specially adjusted material to look just like car paint. I used an image plane to help me get the scale of each element right and then box modelled everything piece by piece. This was my first time modelling a gun, and I'm pretty happy on how it turned out.


When I looked at my timetable to see how much time I have left, I got a bit worried that I set myself more work to do than I can possibly fit in to the due date, so I really got down to business on Easter. Whenever I had spare time I used it on Maya. Half way through my SSD got corrupted (my work was saved on an HDD) so I had to format my computer and do a fresh install of windows and all programmes. Luckily most of my models were not effected (only a couple of booleans I had to do again), but I also had a copy on my memory stick, which was a bit old, so I was saved there.
Assigning the correct paint and material for the train colour was a headache, I had so many different approaches and experiments but none seemed to work. Then as I was talking to a friend about bump mapping it hit me, I realized that I could use the glass scratches texture I have as a bump map. So in Photoshop I tweaked the texture, removing some bits that wouldn't fit the train, and I also learned of a tool that Photoshop has which is perfect for creating seamless textures; filter>other>offset. Now I was supposed to make a rusted mad max style train, but I just couldn't come up with a way to make rusted textures look good, so I decided to sacrifice the mad max style for a better looking model. I decided that I only have to hint of this being a bandit train rather than modelling in mad max style.
Since I completed my first train over Easter I knew I was on track to finishing on time.
The next two images are what I faced after corruption.

I downloaded this texture from cg textures. It's a great texture but i decided it needed some tweaking to suit my train

I made the whole texture to fit the yellow paint of my train

This is the bump map i creates by selecting all the lower levels and making them the same dark grey. Then I changed the exposure to make the grips stand out more.
I downloaded this texture from cg textures. It's a great texture but i decided it needed some tweaking to suit my train

I achieved this colour by gussian blurring my yellow floor, picking the colour and making one large seamless square. This was to make sure that the colour of my paint matches its surroundings.

I found this image on the internet which is really well made and so I decided to experiment with bump mapping using it.
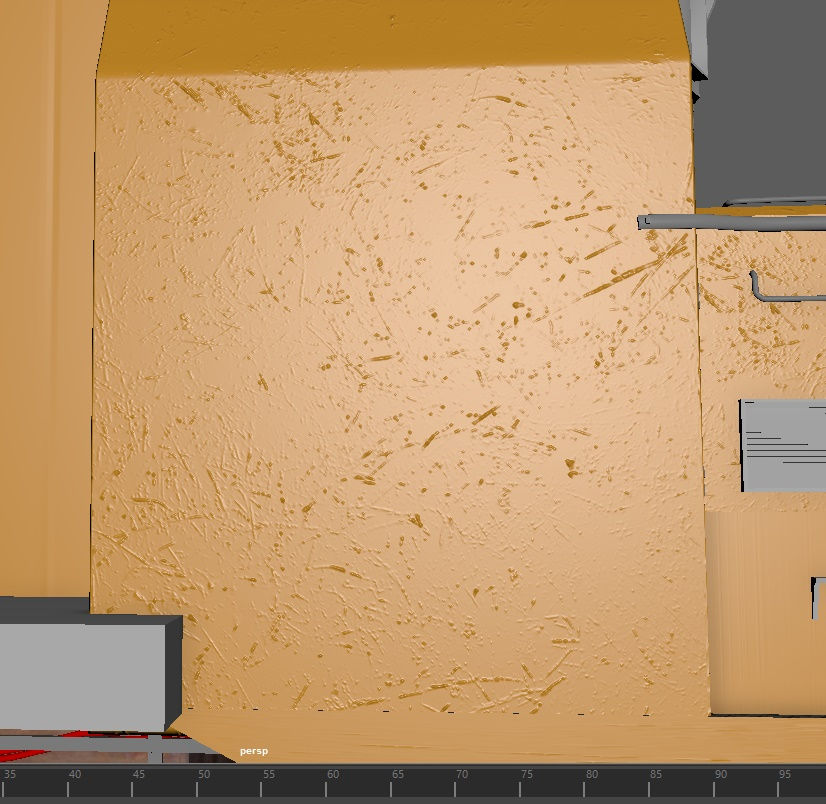
This is how the final result looks like (not rendered), which was later removed to minimize the render time.
I achieved this colour by gussian blurring my yellow floor, picking the colour and making one large seamless square. This was to make sure that the colour of my paint matches its surroundings.
 |  |
|---|
Week 6
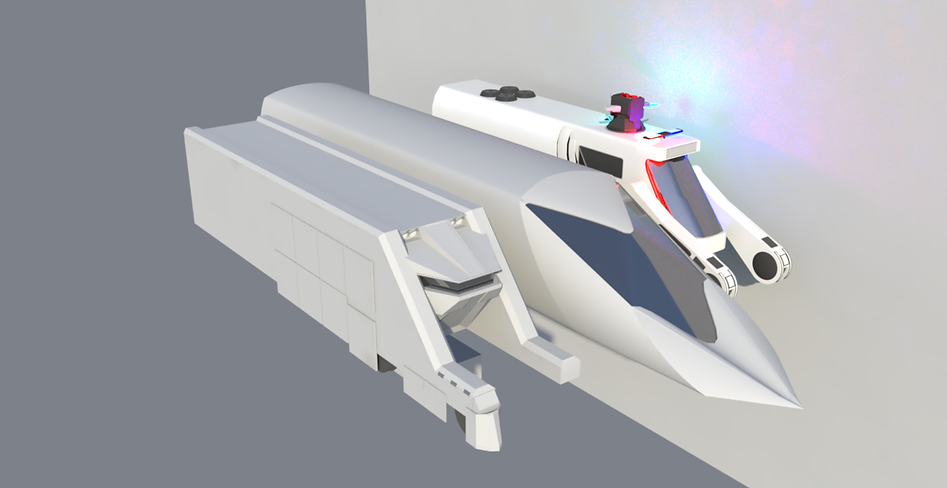
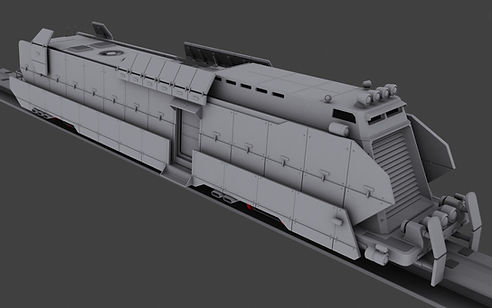
Week 6 was when I started making the police train which was a lot of trial and error, since I didn't have an exact shape in mind and ended up with 3 different versions which all ended up getting scrapped. Train no: 1 was a futuristic white police train, which looked alright but didn't fit in the scene at all. Train no: 2 was similar to the bullet train but then again it didn't fit the scene, so I decided to go with a more military like which drew inspiration from the assault amphibious tank, but again it got scrapped. There I was with no ideas when I came up across one of my early prototype bandit trains. It was a basic model mapping out a pretty futuristic armoured train. I remade it since I used a lot of booleans to make the first one making it unstable so it wasn't a great shape to work on. I remade some areas to make it look more militaristic such as the armour and front bumper. The image you are seeing below is the very first prototype of my bandit train, which got remade to an army train.


I made a sandy desert with a lot of bumps and holes in mudbox; I made sure that the part the rails were on was flat. I then proceeded to find a texture, but unfortunately I didn't come across a good-looking seamless one. So I went ahead and used a non-seamless texture, then using Photoshop offset tool with the healing I made my own seamless texture. Since I made this after I did all the optimizations to the rendering, I didn't add any bump mapping to the sand to make it realistic, but I don't think it would've been worth the massive spike in rendering time.
Week 8
On this week I used maya's set frame to map out my animation for the camera flying around the scene. The initial plan was to make a minute max of animation and hopefully even reduce that to 40 seconds, but as it turned out my animation lasts 1:20 which in itself some parts are too fast and I'd like them to be slowed down. I can slow some parts down in after effects but that would make the frames inconsistent and maybe choppy, therefore I will have to find a balance between how long the animation and how many frames I cann afford to be stretched so that the video doesn't stutter.
Week 9
The main part of my project is done. The whole Maya project is rendering on 3 computers, which would take around 4 days for one computer to render. To make use of time I worked on my website and planned out the post-processing. After finishing my website I received valuable peer assessment feedback where I was reassured that my project is doing great which inspires me to carry on to make great after effects, and that I could improve my research (by the time you're reading this everything is finished).
Week 4-5
Sound design
This is my first time doing sound design, although I had experience in matching video footage to the audio and manipulating sound to fit the video. It was harder to find the sound rather than to make it match; I was lucky to find a train passing sfx that I could use, I got gun shots from random army videos and then editing it to sound as if it's approaching the camera, the saw and slow motion sfx was a free downloadable sound that everyone can use. However what took the longest was to make the deep bass running throughout my project. It was extremely hard to find, and then I had to make it so it could repeat itself while not being obvious repetition since there were only 19 seconds of the sound effect. You can still tell where the different bass rumbles meet, but that is only if you listen very closely and play the video multiple times, which is good enough for not being noticeable the first time you watch it.
Week 10
Class Critiques
With pretty much everything finished I had one last step to do for my work to be complete. All I had to do was to sync up my audio with my video footage in which I have a lot of experience with, but this time I had to use after effects rather than my familiar software Sony Vegas. After effects has an effect where you can frame blend which inserts fake frames in between your real pictures, those blends are just both frames combined together. The effect that it gives off is a much smoother video, which greatly benefits me as I can slow down the video without it looking as choppy and I don't have to do any 3D rendering. I rendered at 30fps in Maya which allows me to play the video at 0.8 speed to make it not stutter, but thanks to frame blend I manage to play the video at 0.7 speed which doesn't seem as much but it effectively it added around 36 seconds to my project.
The review that I got from my teachers and other students suggest that I should properly layout my inspiration and research for my website. They also talked about hoe I should make the camera movement smoother, especially at frames 600 to 675 where the camera stopped twice for no reason. I fixed this by using camera curves, these let me manually adjust the pathing and its angles that it'll take when travelling from point A to B. These curves can not only be used for smooth camera movement but any kind of animation, so learning it early is really beneficial for the long run.
Problem Solving
Rendering was by far the most worrying and terrifying stage of my project. To render a 720p image with decent quality it took me an average of 27 minutes, and this was on a 3.5ghz processor and 8 gbs of ram. At first it didn’t bother me that much since I wasn't going to put it in a real time environment, but after doing calculations it would take me 810 hours to render 1 min of the camera flying through the scene, where I didn't have a month to render it became really stressing. To compromise on the render times I removed all see-through glass that would have to render refractions as well as reflections, I cut down on the reflectivity on all materials, deleted some bump mapping that was not necessary, rescaled textures to a reasonable size, and I replaced mental ray (mia) materials wherever possible with blinn or lambert. This whole process was incredibly frustrating as I had to force myself to downgrade my work, but it had to be done.
After all the optimizations I managed to cut down the render time to 2 min from 27 min, which saved my project.
Final (Pre-formative assessment)
In my formative assessment I was fed back that all my work is great but my camera movement is unrealistic. My camera movement was in the style of the frozen heist, which means one continuous camera moving around the scene without any transitions. The frozen heist was made i real life and was made to look like it was fake, they did this by making the camera fly extremely close to objects or even through some. The problem with my work is that it is fake and by having this camera movement it enforces that my scene is fake. To create a more realistic look I would have to cut the video up with cinematic transitions.
Final (Post-formative assessment)
My thought process going through the project was to remake my camera movements to get realistic and totally different camera angles, but that was soon scrapped as I had not many days left in addition to many other students were rendering overnight so That also limited me to what I can do. I've decided to cut up my footage of my final and mix it up so that it still makes sense, and I follow my feedback on making the camera more realistic.
Evaluation
The project was a massive rollercoaster ride of emotions; the idea and preparations were great and you just can't wait to get going, then you encounter problems which make you worry and want to start over, you overcome them and make a great 3D model, rendering problems start which starts the tedious process of lowering the quality of your work, but at the end when all of the practical work has finished you feel relieved and great from finishing your first major project.
Starting off I had such high aspirations on the project, which didn't make it to the final version such as characters and bullet time. Characters and bullet time was not made as I simply ran out of time from fixing render issues and other problems. Other students were making one character as their whole final major project so I thought that there's no way I can make a couple and pose them in my scene. If I was to rush the characters, yes the scene will make more sense, but it will also lower the quality of the whole project, as the low detail models will bottleneck the higher detail models. All in all I prioritized quality over quantity, which is the main purpose of the project.
As stated in my statement of intent I aimed to create an extremely realistic industrial train, which will be modified, in a mad max style. In my opinion I’ve failed in recreating a madmax environment, but I still think that my project is a success as it still follows the story; the bandits are attacking/raiding the law enforcement.
My project changed in unexpected ways, I thought that at start I will have very little trouble in making futuristic trains which turned out to be the opposite: the bandit train was a lot easier to make. I even had to change the police train into a military so that it fits the scene, This is because I never had a specific design in mind, which shows that if you have something concrete that you want to follow you will have a much easier time rather than inventing something new.
I’ve researched a large variety of trains, their style, and what emotion might they symbolize. I’ve looked at the Advent train from "XCOM 2" (2016) by Firaxis games, which has a very menacing and a repelling look. They achieved that through not only by their use of colours but the mysterious futuristic design. Its incredibly small window at front makes the train look like a moving fortress. The "Madmax" style (2015) by George Miller achieves the same feel but in a completely different style, the madmax style is regular objects combined with lots of different scrap to achieve a specialization other than just driving. I was going to combine these two styles together to make the scene feel menacing, but because of design difficulties I couldn't have achieved that. Even though I've failed in the style I wanted my work in I'm still proud and happy of it as prioritizing detail is more important than style in this project. This project is meant to show off my modelling skills rather than my ideas. I managed to successfully follow the timeframes that I set out for the project with a consistent level of detail throughout.
I also looked into camera movement, specifically how the frozen heist presents itself. The camera consistently flies extremely close or even through objects, which creates a sense of chaos, disorder and unrest, this is because there is usually a clear path for the camera but if there are things obstructing the way then there must be something wrong. I managed to achieve that in my project how the camera slows down and moves across the different pieces of destruction. The slow motion movement when the camera moves next to the bullet shows off the chaos in the scene, later you can see what sort of damage these bullets caused.
If I had more time with the project I would've tried to model and pose the characters to flesh out the scene, then model low detail objects in the background such as cacti, rocks and some grass sprouts. Up to now my train has only the front cabin when I hoped to add carriages which symbolize what this train is supposed to do i.e. a battle carriage made for combat and lots of other carriages from different trains to suit the bandit's needs. The police train would've had battle, prison and sleeping quarters. In post-processing I would've research cinematic techniques and add them to my work, these include depth of field, volumetric transitions and some special effects (sparks and smoke). My sound is also very flat, the first few seconds set a high expectation for the sound, but as you go on you get a constant loop of a deep bass rumble. I would've heavily improved on sound as it adds so much more atmosphere to the project. I hope to make the sound like in the "frozen heist" or like the "Cyberpunk 2077"(2013) trailer by CD Project Red, where the sound is slowed down and only plays when the camera is right next to the object. You can also hear voices/screams of people in the scene. I didn't manage to do this because not only did I run out of time but I also didn't have the software necessary and sound files are hard to come by so I would've had to make the sounds myself and with no experience in music/sound software I doubt it'd turn out well.
George Miller, 2015, Mad Max, Movie
CD Project Red, 2013, Cyberpunk 2077, video game trailer
Philips, 2009, Frozen heist, Technology showcase
Gearbox Software, 2009, Borderlands, video game
Firaxis games, 2016, xcom 2, video game